Wednesday, February 17, 2010

On Happy Accidents and Power Tools

Well, I finally got some window treatments up in the Master Bedroom. And it only took three years.
Mike loves it when I call him at work to ask where the drill is. Actually, I did okay - no errant holes (in the wall OR in my skin).

I'd been meaning to hang drapes in the MB for a while, especially after seeing the dramatic difference drapes made in some of our other rooms. I wasted a lot of time drooling over several panels from Pottery Barn and Anthropologie, but in the end, I just couldn't justify the prices. Which, unfortunately, ran from $99 to $248 per panel. Times six. Ouch.

The Ella Drape from Pottery Barn $99/panel (96")

The Audrey Drape from Pottery Barn $99/panel (96")
The Adorations Drape from Anthropologie $178/panel (96")
The Avignon Drape from Anthropologie $248(!)/panel (96")
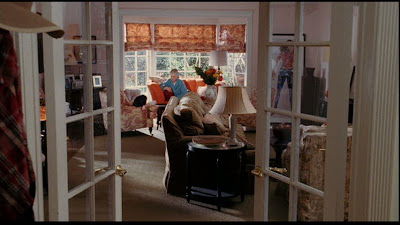
Had I been absolutely, positively sure that the MB would remain the same for a while, I maybe, maybe would've saved up and taken the plunge with the expensive drapes. BUT I'm not sure about that the room WILL stay the same, for a few reasons. For one, I'm not crazy about our headboard and would like to get a new bed sometime soon, if the budget allows. Also, I've had second thoughts about the paint color, which I do love, but Mike does not. So, rather than buy some crazy-expensive drapes that were going to look nice in THIS bedroom, I figured I'd play it safe for now and buy some cheaper, neutral drapes that would look nice in almost ANY bedroom.

So, my sister and I headed out to Target. Although I have three windows in the MB, I initially tried to get away with using only 4 panels, in another attempt at keeping costs down. I thought I could maybe hang just one drape in the areas between two windows...


Soooo, after digging through a VERY picked over window treatment selection (almost the entire aisle was on clearance - which was good and bad), I really didn't see anything that jumped out at me. I settled on a Thomas O'Brien herringbone drape that looked like it had promise. The color on the package said "White," but these drapes are most definitely NOT white. They're more of a cream or ivory color. I told my sis that I had a feeling I was gonna get the drapes home and either hate them, or end up loving them and this would be one more happy accident to add to the list. Luckily, I snagged the last four 95" drapes. No small feat considering the state of the drapery aisle. As an added bonus, the panels had been marked down from $34.99 to $24.99. I also picked up three black curtain rods on clearance for $9.99.

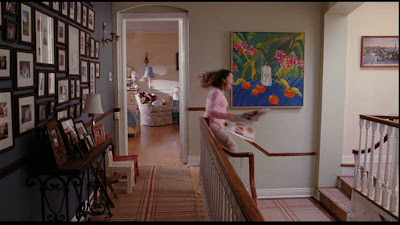
I went home with my panels and curtain rods and got to work. An hour later I was staring at some surprisingly nice drapes in a room that looked liked someone had cut some serious corners by trying to use four panels where there definitely should have been six. It seemed I had underestimated the angle of the bends in the wall and there was no way the four panel plan was gonna work, short of me buying an expensive rod system.
I already knew I'd gotten the last four panels in my local Target, but a quick Internet search showed that they were available online and in a Target store a few towns over. The very next day, my wonderful mother stopped in to said Target on her way home from work and picked them up for me!

And now that I have all six panels hung up and looking pretty, I am officially declaring this one a happy accident.

P.S. Happy Birthday Dana!

Monday, February 1, 2010

A Funny Thing Happened...

Sometimes, when Mike works overnight, dangerous things can happen. It all started innocently enough. My lack of spouse accounted for me sitting up til all hours, listening for strange sounds that only existed in my head (ah, the life of a firefighters wife) and watching chick flicks to pass the time. And that's when it happened - while absentmindedly flipping through channels, I came upon one of my all time favorite movie house movies. Spanglish.


It is not easy to find interior shots of the house in this movie. You'll just have to watch it for yourself! There are actually two houses: the Clasky family home and the Malibu vacation home they rent for the summer. I, however, am exclusively obsessed with the family home. The home itself can't be easily put into words. It's beautiful, of course. Just the right amounts of classic and well-loved. The house is full of knick-knacks, accessories, pillows, you name it. Some of you might think it just looks cluttered, but I love it. It is very apparent that a family lives here. And yet, it's classy and elegant all the same. They have a freakin' foosball table in the middle of the family room and yet somehow, inexplicably, it's still beautiful.

My favorite room in the house is the master bedroom. It's a blur of florals and stripes and colors and yet it all comes together. I want to hibernate in this room all winter. That being said, even at 1:00 A.M., while listening for signs of a break-in that would never happen, I realized that the closest I was gonna get to a room like this was re-creating it as best I could in my own, much smaller, bedroom. And so, after several days of Spanglish-induced shopping, I've come to one absolute conclusion: I CANNOT STOP BUYING PILLOWS AND BLANKETS.


And now, my bed looks like this:


I think I've officially reached the maximum allowable pillow count on our bed. I'm up to 10(!). Or is it 12? Something like that. Mike's actually been a good sport about all of this. I suspect it's because the bed, if nothing else, has become infinitely more comfortable. And after all, pillows are cheaper than shoes and handbags.

On Saturday, I attended a lovely wedding shower (hi Jen!) with my mother-in-law and sisters-in-law. When the shower ended, my sister-in-law, Kristen, my mother-in-law, Loretta and I decided we weren't quite ready to go home yet. So where did we go? Well, T.J. Maxx of course! Ah, the old standby. The place where I feel almost as at-home as at home. T.J. Maxx is always hit or miss, but when you hit, you HIT. It was one of those days! Kristen, Loretta and I ended up spending an hour "enabling the hell out of each other" and while we all walked away with some very cute things, Loretta was definitely the grand-prize winner of the day. Loretta went home with THIS:


FOR SEVENTY-FIVE DOLLARS! Can you believe that!?! We later found out that the chair, from the Compositions line by Schnadig Furniture usually retails for around $1,000.00!!! It's from the same maker that does all of the Ralph Lauren Home furniture. Unbelievable! We literally did NOT believe the price tag. We kept asking the T.J. Maxx employees, "Well, what's wrong with it? Something has to be wrong." But no, it was pretty much perfect. And you should have seen Kristen man up to carry the chair into Loretta's house while wearing two-inch heels. Like I said, it was one of those days.

I ended up getting a cute little table to go behind the chaise lounge in my bedroom. The chaise currently serves as further evidence of my blanket/pillow buying madness. I've wanted it to serve as a good place to read, but that wasn't happening until i got some good light in there somewhere. And the reading lamp I needed wasn't happening until I found a tall, narrow table to fit behind the chaise. So now, I have my reading spot. I also snagged that tray on the blanket, it's really beautiful in person, with a mother-of-pearl type inlay. (Shout out to Jen again - see your shower favor there???)


Now, I need some artwork to hang above the chaise. This one section of wall looks particularly sad and empty. For some reason, I don't like the idea of buying art at chain stores. I'll be stalking etsy for something, I think.


Jeez, it's embarrassing when you forget the remove all the "daily life" crap from your pics before posting...


I'll leave you with this pic of Finn and Cullen at public skating on Saturday. Here's Finn giving his little bro a ride around the rink. In the interest of full disclosure, this picture was taken seconds before they wiped out. Not to worry, there were no serious injuries sustained. Although Cullen did tell me his eyes hurt. Whatever that means. Seeing as he was wearing a helmet with a full cage on it. I think he just picked a random body part and struck out this time. Ah, well.

Pics of the World's Smallest Bathroom to come! Some day.
Some Spanglish pics found at Hooked on Houses.

Monday, January 25, 2010

A Month Late. A Buck Short.

Okay, yes, it is officially a month after Christmas. But I couldn't very well let these pics go to waste, now could I? Or, maybe I could have, as once again half of my pics are from my crappy cell phone camera...


Annnd, of course, any excuse to show off the rink...


On a COMPLETELY UNRELATED NOTE (as in, NO this is NOT some kind of "hint." NO, I am NOT pregnant again). I found this old scan while going through my computer looking for the Christmas pics. Is this not the most freakish sonogram you've ever seen?


This is Mr. Cullen, in utero, acting as if he was fully expecting us. I think he's saying, "Here I am! Over here! See you in July!" I usually cannot make heads or tails of these things, but Cullen was doing his damnedest to make it all plain as day for his sometimes-a-little-slow Mom. Okay, enough about that. Just had to share that one.

Tomorrow I'll post some pics of our quick fix of the World's Smallest Bathroom.

Monday, October 19, 2009

Works in Progress

The last time I mentioned the formal living room and dining room was almost a year ago. Jeez. Now I feel guilty.

Anyway, to help alleviate all this blog guilt, I thought I'd share some current pics of the formal living/dining area to keep you updated. Sorry these pics are so dark, I'm not sure why they came out like that...

One of my favorite things about the living room is my little craigslist-dresser-that-could. I talked about it when I bought it, here. So what if I started this project in '07? Heh heh. I finally got the dresser painted (BM Monterey White) and added the new hardware from Quality Bath.

After lusting over the botanical prints from Restoration Hardware, which are like, $2700 apiece (okay, I'm exaggerating), I decided to make my own - and so I did. I picked the ferns myself during one of our impromptu family hikes and bought some nice, coordinating card stock at Michael's. The little decorative labels came from Michael's as well. I looked up the names of the different ferns online. Some of them might even be correctly identified! The frames came from Christmas Tree Shop - I swear the have the cheapest frames anywhere! Their frames are all over my house. The total cost of the project was about $45 for all nine botanicals. Not bad, eh? Much better than that $1800 it would've cost at RH, anyway.

We also (finally!) hung the window treatments. These are some of the very first items I bought for the house back in '06. We stored them for years until we were ready for them. I fell in love with the drapes the moment I laid eyes on them in the Pottery Barn catalog. I patiently (or not so patiently, depending on who you ask) waited for them to go on sale, and the rest is history. And you know what? I still love them. Every day I look at them and think, "I love these drapes! I love these shades!" I do have to admit that I was a little worried about becoming yet another PB carbon-copy-house. But they ARE only window treatments and I DID see the roman shades in the Kate Townsend-Simpson house on lonnymag.com (which, in my mind, gives them serious street cred). Moving on...

When the island became usable, we were finally able to move the round table from the kitchen into the dining room. We bought this table specifically for the dining room, and I think it looks really great in there. The table came with four leaves that extend the table to a huge 81" diameter - all while remaining round in shape. The pictures show the table with the leaves on. If you look closely, you can see the seam where the leaves meet the actual table. For the record, all those extra chairs in the room were placed there for a party and aren't normally there...

I love love LOVE the idea of having a fireplace in the dining room. I picture everyone gathered around the table at a big Christmas Eve party, with a fire warming the room while it snows outside. Hopefully, this will come true and I'll have the pics to prove it!

The only snag we hit with the fireplace was that we had to place the table so as to ensure that even at 81", somebody's seat (literal and figurative) wouldn't end up getting scorched. So, we had to set the table slightly off center. For a while, I had a hard time getting past it, but as the room gets filled in, it looks better and less noticeable.

Mike and I recently found some chandeliers that we actually agreed on (oh happy day!) online at Golden Lighting. I bought the rugs for these rooms online at Target.com. Typically, I don't like buying certain things sight unseen, but I was getting desperate. At the time, I was dying for seagrass, but we were on a strict budget, and these 8x 10 rugs were something like $140 a piece, with free shipping. Hello! Mike HATES them - but I love them and he loves me. So for now, they stay. Still, I'd love to have seagrass someday...

The living room still needs lots of work and lots of new furniture, as discussed in my recent sofa post. Almost everything in these rooms came from craigslist. Literally. Some of it will stay, but some of it has got. to. go.

So, I guess that's it for now. Hopefully the rooms will be a bit more pulled together at the next update. Maybe I'll even have a new sofa!

Friday, October 9, 2009

Seamingly Obvious

So, the island is finally DONE! We have a working dishwasher! And a working convection oven! I cooked a pork roast in ten minutes flat. Not bad, eh?

Of course, I don't have any pictures of the finished island - that would be too easy. What I DO have however, is a mini-tutorial on how to seam Ikea butcher block together.

From day one of island planning, Mike and I knew that if we wanted to save money by going the Ikea route, we'd have to seam together two pieces of their butcher block to get the proper size. When we looked into doing this online, we could not find ANYTHING on seaming Ikea butcher block. Sure, plenty of people were seaming end-to-end to use for counter tops, but we needed to seam it horizontally - the long way. After searching for instructions and coming up empty, Mike decided to bite the bullet and go for it. I don't know if it was sheer luck or sheer genius or both, but the end result looks damn near perfect. Can you find the seam in this picture? Yeah, me neither - but it's there somewhere:


If you are interested in doing this, here's the play by play:

We started with two pieces of 73 1/4 x 39 3/8" birch butcher block (which you can find here: www.ikea.com). To create our 48 x 65" island, we could have bought the smaller, cheaper 73 1/4 x 25 5/8" pieces of butcher block, but decided to use the remnant we'd be creating for our future laundry room project. Two birds, one stone and all. So anyway, we used almost the entire first piece of butcher block and added about 10" from the second piece - creating a nice, big remnant for the laundry room.

To begin, Mike made horizontal cuts on both pieces of butcher block, at the first possible seam (about 1.5 inches in), using a circular saw with a fine blade (the higher number of teeth, the better). He had made a guide for the circular saw, to ensure a straight, clean edge on both pieces. These cuts were very important, as these were the ends that would be seamed together and therefore, the cuts had to be as close to perfect as possible. An added bonus to having extra butcher block to work with was the option to re-do a cut if we weren't happy with the result - we'd simply move to the next seam and try again.

Once we had two cuts we were happy with, Mike used a router with a straight tip router bit to fix any inconsistencies caused by the circular saw. He ended up taking about 1/16 to 1/8 of an inch off each edge, again using the homemade guide for accuracy. He then used a biscuit joiner, roughly every six inches and a Kreg Tool (found here: http://www.kregtool.com/index.php) to put screws in between every biscuit. This was definitely overkill, but as we have an overhang portion on our island, where part of the heavy butcher block top is supported only by turned legs rather than a base, we decided to err on the side of caution.

Then, Mike applied wood glue at the new seam and used four HUGE four foot clamps to hold the pieces together. We spread the four clamps out over the 73" length of the island and they worked fine. We then let the glue dry for 24 hours. A tip: do NOT wipe glue residue while it is still wet. This will only cause it to spread thin and it will become even more difficult to remove when it dries.

After the glue had set for 24+ hours, Mike lightly scraped and sanded all glue residue from the top. He then made the vertical cuts needed to take the 73" length to 65". Once the top was properly sized, Mike again used the router, this time with a Roman ogee bit, to put a nice custom edge on it:


At the end of the day, this is what the island looked like (before dishwasher and convection oven were installed):
We still have to treat the top with mineral oil, but we are very happy with the results so far. Not bad for $400 worth of Ikea butcher block, especially considering the laundry room table we'll get out of it. Quite a difference between $400 and the $1000-$2000 we were quoted for finished pieces of butcher block this size.

Gotta love money-saving DIY goodness.

Thursday, October 1, 2009

Have a Seat?

Sofas. Couches. Settees. Divans. Divans?

Call them what you will, we need one. If I have to look at the what-was-supposed-to-be-a temporary-craigslist-sofa-that-has-somehow-stuck-
around-for-three-effing-years
sofa in my beautiful, formal living room for one more day, I am going to become suicidal. Or, sofacidal. Heh. I just made that up.

I've seen some incredible prices on furniture lately. I don't know if it's the economy, or the fact that Ikea has recently graced us Bostonians with its presence, but prices seem to be falling. Which is a good thing.

I have been looking for a nice, sturdy (preferably slipcovered) sofa for forever. Well, it seems like forever. I've ordered fabric swatches from half the furniture companies in North America. I have my heart set on a light colored sofa, so feel free to snicker behind my back. I *think* I've narrowed it down to three options. Of course my husband, ever the opinionated decorator, will have to have a say in all of this. But, for now, here are the three I'm considering (all are under $1500):

1. The Eaton Sofa from Nantuckit Furniture. Oh, how I would love to own the two-over-two model with a beautiful natural linen slipcover on it. At $1339, this one wouldn't totally break the bank. Plus, it IS slipcovered, which ranks high on my wish list as we have small children and "machine washable" is pretty much a prerequisite for anything in our house.


2. The Brooke Sofa, which I found at Boston Interiors. Not sure if I'd be able to find it elsewhere, but at $1299, the price isn't bad. It's not slipcovered, but I do like it. I don't know much about their quality, though. Or even where their sofas come from for that matter.3. The Loring Sofa from Room and Board. I realize this one isn't slipcovered either, but look at it! So beautiful. I love the tight back and the two (instead of three) seat cushions. And of course, I could always get a slipcover made some time down the road. At $1199, it's actually the cheapest of the three and currently in the lead in the Sofa Race in My Head.


I've also always loved the Seabury Sofa from Pottery Barn, but at $2000+, it's a long shot. I might be able to track down a similar model through Rowe, as I believe they make some of the PB furniture, but we'll see.

As much as I'd LOVE to see a new sofa in my living room, I'm not 100% sure we should be looking into buying furniture right now, for three reasons...

1. We are finishing up a major home renovation. Translation: We are tapped OUT.

2. We have a four-year old and a three-year old. Both boys. Translation: Anything we buy within the next ten years will undoubtedly end up looking like this:


3. I really, really like white furniture. Translation: See No. 2, above.

Sooo, I guess we have some things to think through. I really believe we'd do okay with a slipcovered sofa, even in white. And yes, even with two crazy little boys. After all, the sofa will be in the formal living room and the boys don't go in there for much other than nerf tag and fort building. Both of which are fairly sofa-friendly activities.

Then again, these are the same kids who drew "elephants" on their new wool rug. With Sharpies.

Friday, September 25, 2009

On an Island in the Sun

I wish. But, we do have an island! And, technically, it is in the sun.


Mike never ceases to amaze. He's about 2/3 done with our kitchen island. The pictures really don't do it justice. For one, those are just our old, beat up chairs in the pic - placed there so we could get a feel for the size of whatever stools we end up buying. And, the butcher block is just for temporary effect. It's not cut to it's proper size yet.

Now, for the specifics: Mike built the base, which will house our Asko dishwasher and GE Advantium convection oven, all by himself. What a man. I've been waiting about three years to test-drive these appliances. We snagged the Asko from the same place we bought our cabinets - a kitchen design center that was closing some of its showrooms. We got our shiny, Swedish dishwasher for about a third of the retail price.

Our Advantium convection oven was a craigslist find. No kidding. It was brand new, in the box - just happened to be a few years old. A contractor's client had decided not to use it, and we ended up buying it for almost a fifth less than what they're going for today. Sure, it is a few years old, but I'd call that a pretty decent trade-off.

Our butcher block countertops came from IKEA (best prices on butcher block e-v-e-r!). We will be joining two pieces of the butcher block together to get the size we need. Then, Mike will put a nice Roman ogee edge on it, using his new router bit. I've seen his practice pieces and they look really beautiful. Finally, we ordered four turned legs online to dress the island up a bit. Hopefully we'll have pics of the finished island soon. Mike is literally obsessed with this project, so I don't think that's a very long shot.

So far, the island project has been smooth sailing. There's only one little detail that's been worrying us (me): the trim work inside the panels. We're considering NOT staining the trim to match the rest of the island, but rather painting it to match the cabinet color. I was (am) worried it'll look too circus-y (that's a technical term, btw). At the moment, the wood trim is not painted at all, it's just wood color (another technical term). The wood color is pretty close to the color of our cabinetry, so it's not a stretch to envision the finished product this way. I'm sure the trim will look better once it's painted the actual cabinet color, with a nice brown-ish glaze to tone it down a bit. Mike is firmly in the circus camp. Me, I just don't know. Any thoughts, one way or the other?

As an aside, after repeatedly changing our minds as to the final shape and size of the island, it looks like we'll be taking down the two pendant lights that are currently hanging in the kitchen and replacing them with one pendant light similar in shape to this one:

We've given ourselves a deadline of October 10th for this project, as we're hosting a family party the next day. Fingers crossed.

P.S. We're in the market for four counter height stools if anyone has seen any good deals out there.